Deploying MediaWiki on Openshift
I will continue writing my blog with the article describing how to deploy your own application to the cloud. This topic is quite new to me because I am professional C++ multi-platform developer, but web is a new industry to me, so in this topic a am kinda newbie.
Why to deploy to cloud? Why can’t we use “normal” hosting for this? Of course, in our case we can do it (and, to speak the truth, probably it is better option) because I don’t need my system to be SO scalable now, but I thought deploying to cloud it would be a great experience and it will help me in the future.
I decided to start with Openshift solution, thought I have been thinking about other possibilities as well (including Google Cloud, Heroku and Amazon Solutions), but I decided to use Openshift because they have free account with quite a good functionality (for example 1GB database for free).
Just to notice, Openshift does not have they own services, instead they are using Amazon for hosting. One can check this using following command
dig +noall +answer wiki-gburanov.rhcloud.com

wiki-gburanov.rhcloud.com. 60	IN	CNAME	ex-std-node151.prod.rhcloud.com.
ex-std-node151.prod.rhcloud.com. 30 IN	CNAME	ec2-54-235-35-49.compute-1.amazonaws.com.
ec2-54-235-35-49.compute-1.amazonaws.com. 1601 IN A 54.235.35.49
Step 1. Creating account and setting up environment.
So, to start with, we need to register at Openshift
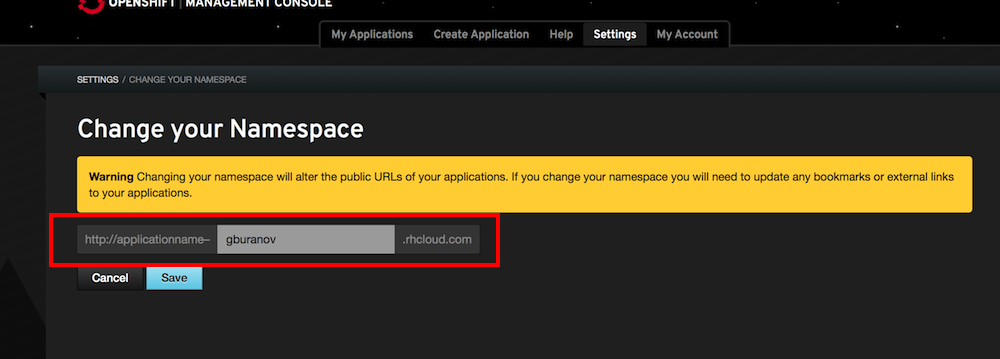
Then we need to define the namespace for our applications. All applications of the same user share the same namespace by using the application URL http://applicationname-namespace.rhcloud.com
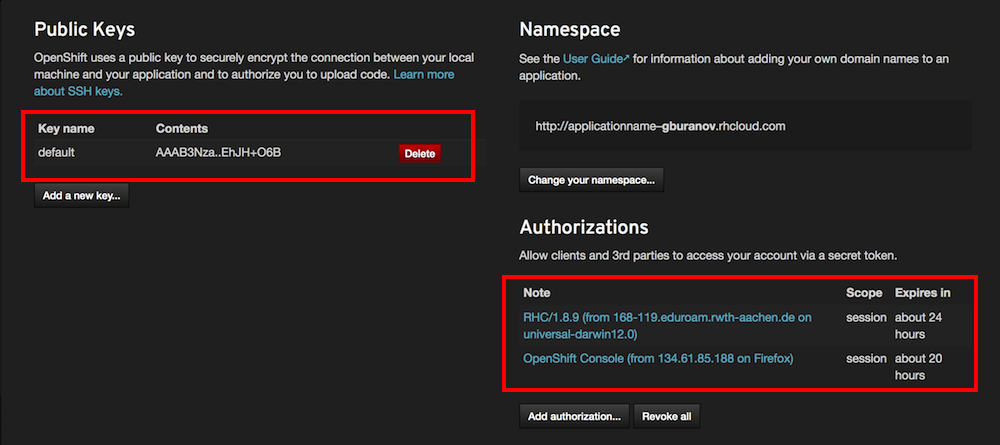
Next step is to install OpenShift RHC Client Tools. Most steps we are performing can be done both using web interface and using client tools, but for the most task client tools are just faster. Note, that client tools installer does not only install tools on your computer, but also do some post-steps, for example sending your SSH public key to server. After everything is done, your screen must have something like this
Step 2. Creating application
In the terms of Openshift all applications consist from cartridges. There are framework cartridges (you must have one and only one cartridge in your application) and embedded cartridges(that include additional functionality). Framework cartridge examples include PHP, Ruby, Perl, Node.js, etc. Embedded cartridges include various databases (including MySql and MongoDB), Jenkins build server, Cron scheduler, and many others types of applications.
I am going to deploy MediaWiki, with database on MySql, so I will create two cartridges, PHP cartridge because MediaWiki is written using PHP and MySql because it is preferred database for the MediaWiki. Node that same things are possible to do using RHC command line tools, but I will use web console here. So, pressing the “Add application” button…

and choose PHP cartridge there. In the next menu one should notice the scaling menu
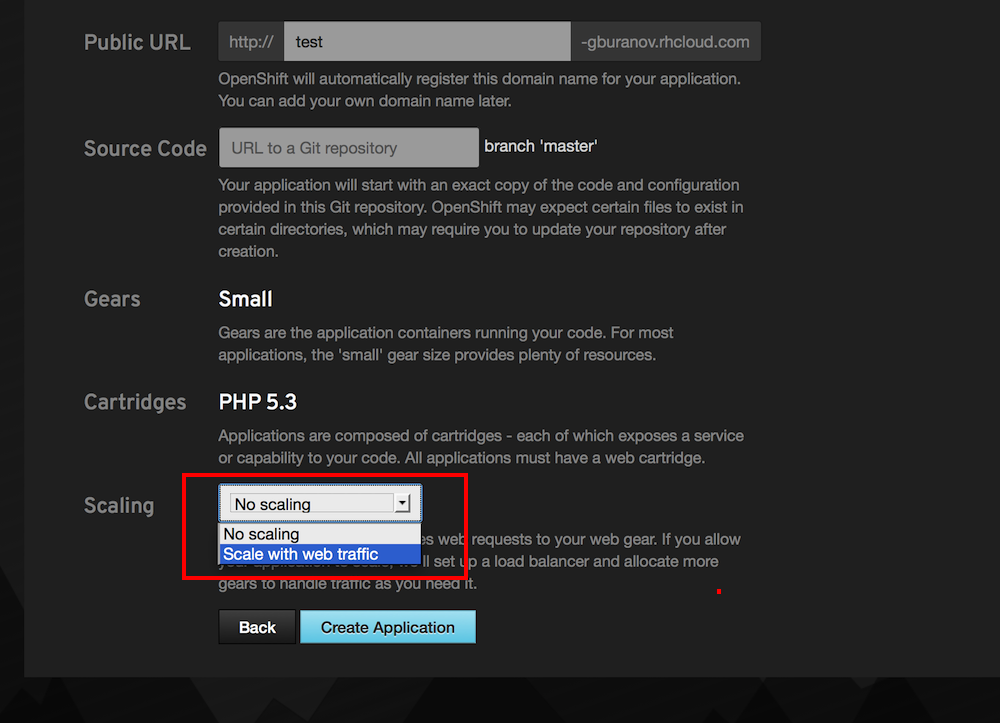
As for now, it is not possible to change the application type from Scaling to Non-scaling. I will choose No-scaling, because we need additional cartridges for scaling, and we have only three for free.
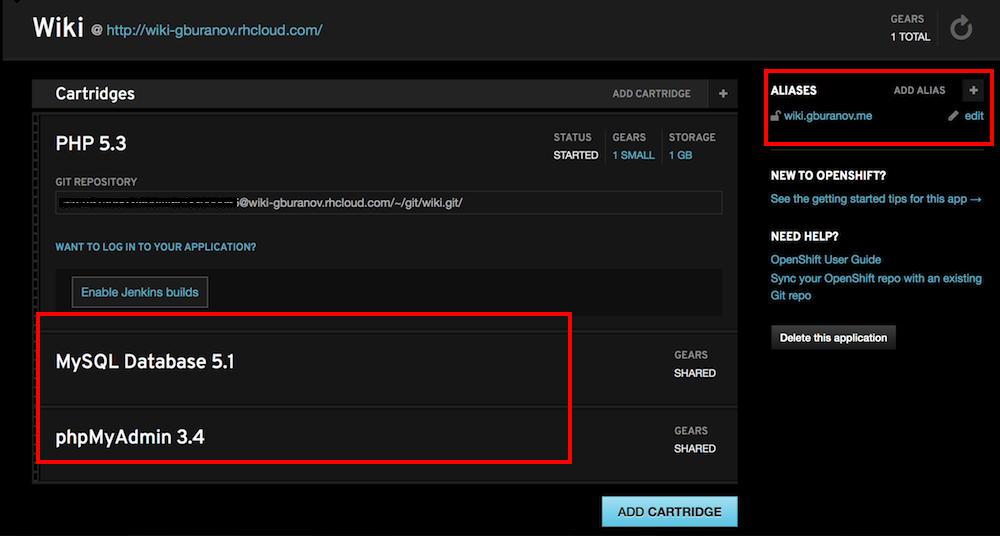
After adding framework cartridge, we need to add additional embedded cartridge for MySql and phpMyAdmin(nice GUI interface for database management) and also create alias for this site(because I will going to set up redirecting using CNAME later). After all the changes we will have the following picture
Step 3. Uploading application to Openshift and fixing configuration
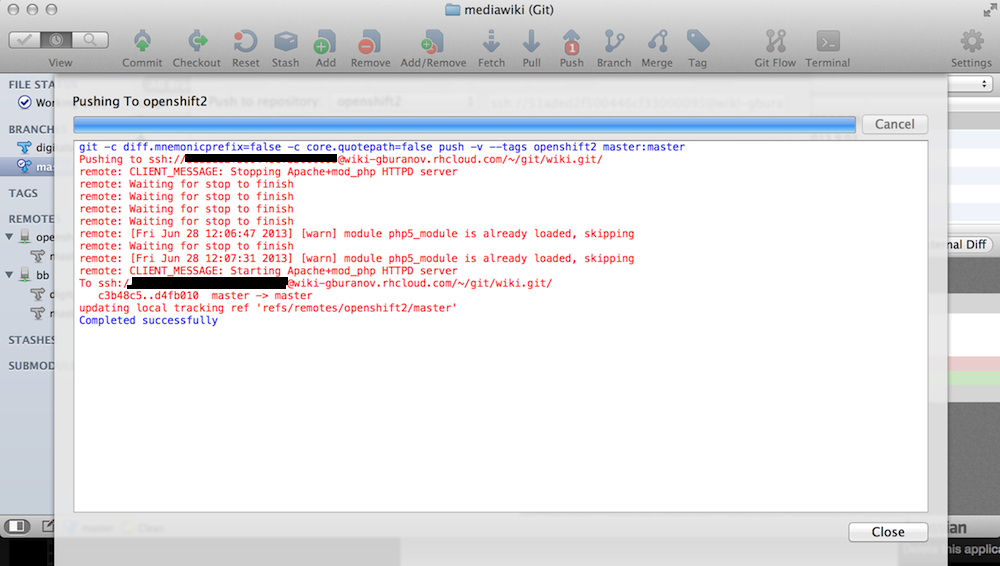
Uploading application to Openshift is quite easy. You just need to download it from MediaWiki download page and upload to GIT repository on server. If you need to remember your GIT application link, you can use the command
gburanov$ rhc app show -a wiki
wiki @ http://wiki-gburanov.rhcloud.com/ (uuid: ************************)
-------------------------------------------------------------------------
  Created: Jun 04  3:35 PM
  Gears:   1 (defaults to small)
  Git URL: ssh://********@wiki-gburanov.rhcloud.com/~/git/wiki.git/
  SSH:     *******@wiki-gburanov.rhcloud.com
  Aliases: wiki.gburanov.me

  php-5.3 (PHP 5.3)
  -----------------
    Gears: Located with mysql-5.1, phpmyadmin-3.4

  mysql-5.1 (MySQL Database 5.1)
  ------------------------------
    Gears:          Located with php-5.3, phpmyadmin-3.4
    Connection URL: mysql://$OPENSHIFT_MYSQL_DB_HOST:$OPENSHIFT_MYSQL_DB_PORT/
    Database Name:  wiki
    Password:       ************
    Username:       ************

  phpmyadmin-3.4 (phpMyAdmin 3.4)
  -------------------------------
    Gears:          Located with php-5.3, mysql-5.1
    Connection URL: https://wiki-gburanov.rhcloud.com/phpmyadmin/
After pushing changes, different post actions come in place, and the application is deployed automatically (I am using SourceTree Gui client, but of course you can use command line, if you want to).
Step 4. Mediawiki configuration.
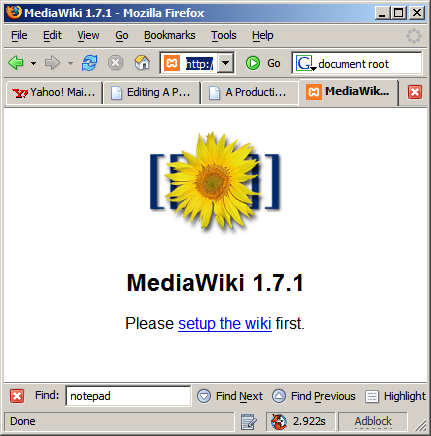
Ok, now our application is successfully deployed, but setup has not been made yet. If we type our site address, the will see something like this
Just one small, but very important note. Somewhere in the middle of setting up the database, you need to enter your database credentials. You can easily find out database name and credentials
94-011:~ gburanov$ rhc app show -a wiki
  mysql-5.1 (MySQL Database 5.1)
  ------------------------------
    Gears:          Located with php-5.3, phpmyadmin-3.4
    Connection URL: mysql://$OPENSHIFT_MYSQL_DB_HOST:$OPENSHIFT_MYSQL_DB_PORT/
    Database Name:  wiki
    Password:       ************
    Username:       ************
But how to find out database IP? It turns out, that Openshift have environment variables for all database values
- OPENSHIFT_MYSQL_DB_HOST
- OPENSHIFT_MYSQL_DB_PORT
- OPENSHIFT_POSTGRESQL_DB_USERNAME
- OPENSHIFT_POSTGRESQL_DB_PASSWORD
After filling all the fields, the LocalSettings.php is generated, and you need to put it to your main php directory.
## Database settings
$wgDBtype = "mysql";
$wgDBserver = $_ENV['OPENSHIFT_MYSQL_DB_HOST'];
$wgDBname = "itwiki";
$wgDBuser = $_ENV['OPENSHIFT_MYSQL_DB_USERNAME'];
$wgDBpassword = $_ENV['OPENSHIFT_MYSQL_DB_PASSWORD'];
Next step is to add salt to our LocalConfig.php. We need to obtain salt https://api.wordpress.org/secret-key/1.1/salt/ here and paste it to config file as well.
Ok, that all. Our new Mediawiki is running successfully.
Step 5. Setting CNAMES for our wiki.
Ok, our wiki is ready and running on http://wiki-gburanov.rhcloud.com/ but what if I need better name for it, for example http://wiki.gburanov.me ?
I need to buy gburanov.me domain. I used GoDaddy for it, although I could use something else. Notice, that the alias on the Openshift side is set already (see the previous post for details)
Now, we need to login to http://godaddy.com , choose our domain and run DNS Manager
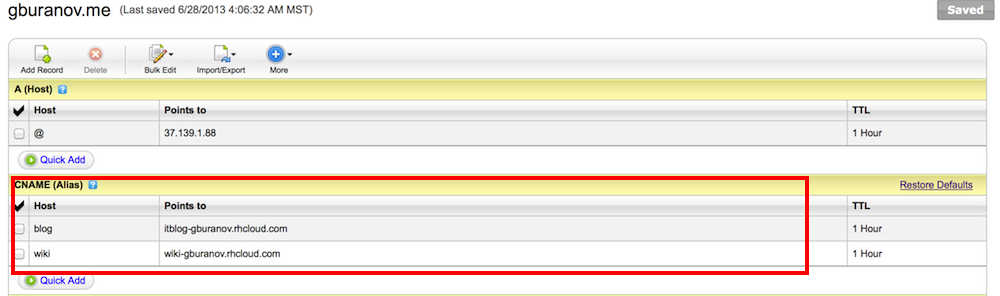
We need to add CNAME alias for one site. The reason why we need to add CNAME entry, not A entry is that Openshift can change server IP. In case of A entry, we can only set IP-address.
One must note, that the changes will not work immediately, it can take several hours to update all the DNS.
And now, the last step! I want not able to find information about it anywhere, and since this was my first web site deploy, I did not even know whats wrong.
So, basically you need to change the LocalSetting.php in the following way
## The protocol and server name to use in fully-qualified URLs
$wgServer = "http://gburanov.me";
$wgScriptPath = "/mediawiki";
OK, now everything is ready and we can type wiki.gburanov.me and yes, we got it!